Making Your First Macramé Wall Hanging
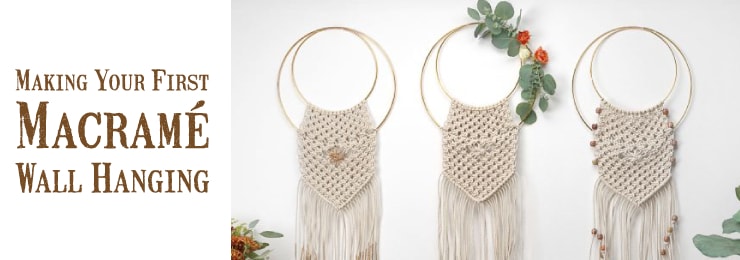
The following article is a guest post by Alexandria Heinz at FTD by Design. We hope you enjoy this beginner look at Macramé technique as she teaches you how to make a macramé wall hanging.
The beauty of macrame is that it's versatile. You only need to know how to tie a few knots and you'll be able to complete most projects. Once you know the basic knots, you can get creative with what you want to use as your base and what type of macrame rope you want to use.
For those first starting out, macrame can be daunting. To help you eliminate your fear of this craft, FTD has a macrame wall hanging tutorial that will give you step-by-step instructions and visuals. No matter what level you're at, you can create this timeless wall art for your home.
Knots You'll Need:
- Lark's head knot
- Square knot
- Double square knot
- Double half hitch knot
If you are unfamiliar with these knots, check out these macrame knot videos.
Materials you'll need:
- 160 feet of macrame rope (3mm thick)
- Scissors
- 10-inch gold hoop
- 14-inch gold hoop
- Ruler (or tape measure)
Step 1: Cut the macrame rope into 16 ten foot pieces.
Step 2: Fold pieces of macrame rope in half and tie lark's head knot around the 10 inch hoop. Repeat this for all 16 pieces of rope.
Step 3: Create 7 rows of square knots, alternating between tieing 8 and 7 knots.
When following this tutorial, the 1st cord is the leftmost cord.
Row 1: Start with 1st cord— tie 8 square knots
Row 2: Start with 3rd cord—tie 7 square knots
Row 3: Start with 1st cord—tie 8 square knots
Row 4: Start with 3rd cord—tie 7 square knots
Row 5: Start with 1st cord—tie 8 square knots
Row 6: Start with 3rd cord—tie 7 square knots
Row 7: Start with 1st cord—tie 8 square knots
Step 4: Attach each of the 32 cords to the 14-inch hoop with a double half hitch knot.
Row 8: Start with 1st cord — tie 32 double half hitch knots to the hoop.
Step 5: Tie rows of square knots and double square knots.
Row 9: Start with 1st cord—tie 8 square knots
Row 10: Start with 3rd cord—tie 3 square knots, skip 4 cords, tie 3 square knots
Row 11: Start with 1st cord—tie 3 square knots, skip 8 cords, tie 3 square knots
Row 12: Start with 3rd cord—tie 2 square knots, skip 2 cords, tie 1 double square knot, skip 2 cords, tie 2 square knots
Row 13: Start with 1st cord—tie 3 square knots, skip 8 cords, tie 3 square knots
Row 14: Start with 3rd cord—tie 3 square knots, skip 4 cords, tie 3 square knots
Row 15: Start with 1st cord—tie 8 square knots
Row 16: Start with 3rd cord—tie 7 square knots
Row 17: Start with 1st cord—tie 8 square knots
Row 18: Start with 3rd cord—tie 7 square knots
Row 19: Start with 5th cord—tie 6 square knots
Row 20: Start with 7th cord—tie 5 square knots
Row 21: Start with 9th cord—tie 4 square knots
Row 22: Start with 11th cord—tie 3 square knots
Row 23: Start with 13th cord—tie 2 square knots
Row 24: Start with the 15th cord—tie 1 square knot
Step 6: Tie 16 diagonal half hitch knots starting with the rightmost cord.
Row 25: Start with the 31st cord — tie 15 diagonal half hitch knots to the left.
Step 7: Tie 16 diagonal half hitch knots starting with the leftmost cord.
Row 25: Start with the 1st cord — tie 16 diagonal half hitch knots to the right.
Step 8: Trim the end of the cords to your desired length.
Step 9: Hang and enjoy!
What do you guys think? Did any of you create Macrame back during its last wave of popularity in the 70's? What do you think of its evolution? Let us know what you think in the comments.
Thank you Alexandria Heinz and FTD for allowing us to use this beautiful tutorial! Check out their blog FTD by Design for great DIY home decor and gardening ideas.
p, li, ol, ul { font-size:15px; font-family: karla; } h2 { font-size: 24px; font-weight: bold; color: #30AC35; font-family: montserrat; }
h3 { font-size: 20px; color: gray; font-family: montserrat; }
h4 { font-size: 16px; font-weight: bold; font-family: montserrat; }
h5 { font-size: 14px; font-family: montserrat; }
h6 { font-size: 10px; font-weight: bold; font-family: montserrat; }
figure { font-family: "Courier New", monospace, monospace; font-size: 12px }
blockquote { background: #f9f9f9; border-left: 10px solid #30AC35; margin: 1.5em 10px; padding: 0.5em 10px; quotes: "\201C""\201D""\2018""\2019"; }
blockquote:before { color: #30AC35; content: open-quote; font-size: 4em; line-height: 0.1em; margin-right: 0.25em; vertical-align: -0.4em; }
blockquote p { display: inline; }
.blog-row { display:flex; align-items:center; justify-content:space-between; margin-bottom:30px }
.blog-row-highlight { background: #fafafa; }
.center-blog-content { text-align: center; }
.blog-row-item-flex { flex:1; }
.blog-row-item-order { order: 0; }
.blog-row-item-padding-left { padding-left:10px; }
.blog-row-item-padding-right { padding-right:10px; }
.blog-row-item-image { max-width:100%; }
.blog-horizontal-line { width: 75%; border-top: 1px solid #e8e8e8; }
.blog-row-prev-next { display:flex; align-items:center; justify-content:space-between; margin-bottom:30px; }
.blog-row-prev-next a { display: block; text-align: center; margin-top: 2px; }
@media (max-width: 800px) { .blog-row { flex-direction: column; align-items: left; } .blog-row-item-order { order: 1; } .blog-row-item-padding-left { padding-left:0; padding-bottom: 10px; } .blog-row-item-padding-right { padding-right:0; padding-bottom: 10px; } }