Laura Croft Tomb Raider Bracelet
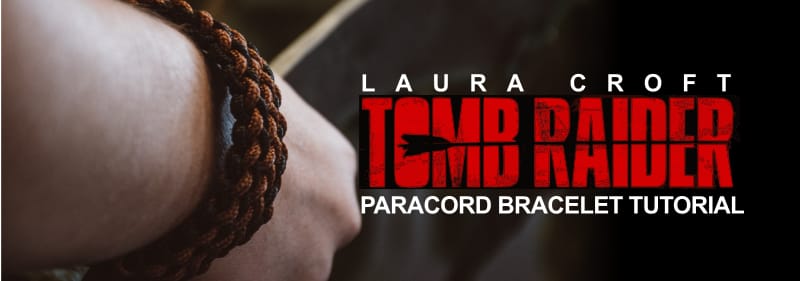
Tomb Raider (Wide Zipper) Bracelet
With the release of the new Tomb Raider movie this last weekend, I thought it would be cool to make a Laura Croft inspired paracord bracelet. While the one she wears in the new movie looks like it's made of leather, I figured having a bracelet of quick-deploy utility cord would not be out of character for the tenacious heroine.
Are You Ready for the Challenge?
This bracelet is not for the faint-of-heart. It's a little bit more complicated than some of the weaves we have highlighted in the past. I found a couple of video tutorials for this weave, but wanted to make a picture tutorial for people who find those more helpful. It took me a couple of tries to get it right, but once you have the weave down, like any bracelet, the rest comes pretty easy.

I will be using #325 (Type II) cord for this one. This weave should work well with the normal #550 as well; it just might be a little bulky. Often times the lighter weight paracords get a bad rap for not being the real or normal paracord, but Type II is still a valid, military commissioned type of paracord. It has different, if not just as many, uses as #550 cord. (Note: I really like how this weave looks with #95 cord, but I wanted something a little more substantial.)
I chose colors black and chocolate brown so that it will look as close to leather as possible. For the tutorial pictures, I used a lighter color of brown, so it would be easier to see.
Step-By-Step
The loop that you make at the beginning should be just big enough to squeeze a diamond knot (made from the same size cord) through. It would be helpful for you to make a test diamond knot to make sure you get the loop the right size. (an overhand knot tied with two strands will be approximately the same size if you don’t want to go to the work of making a diamond knot yet.) To make a diamond knot, scroll down to the end of the instructions.
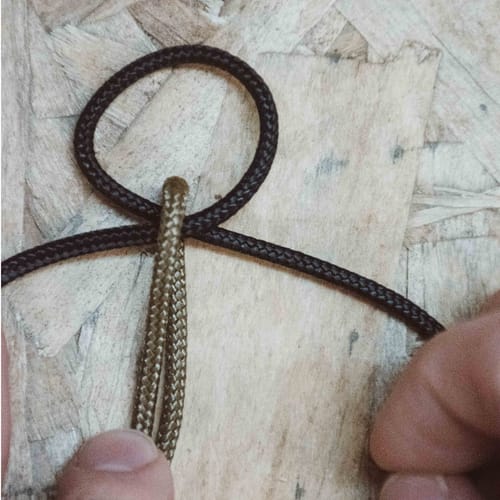
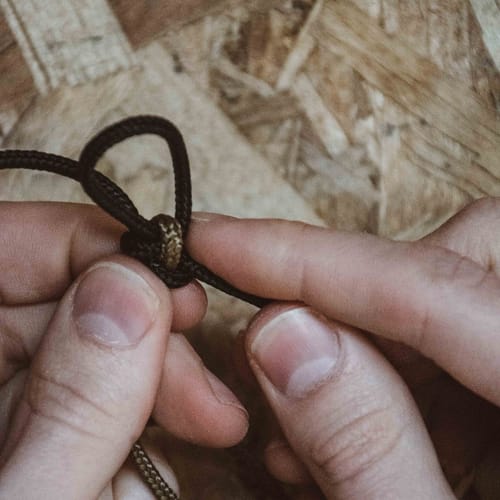
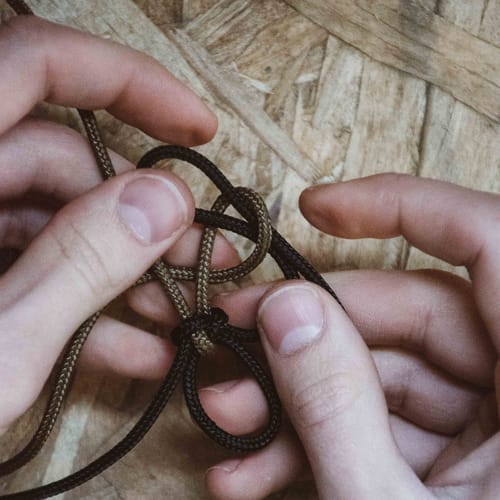
- Start with this configuration. Make a loop in the middle of your dark color, making sure your left strand is on top. Then pass your light color through the loop, letting both ends hang down, even.
- Pass your right black strand over the two middle gold strands and under the other black strand.
- Poke the end of the other black strand around the back and up through the loop created on the right.
- Cinch the knot tight, leaving about a one inch loop at the top. You will have to tighten both colors, but make sure your hole stays big enough to fit your test diamond knot through. (see last paragraph of introduction)
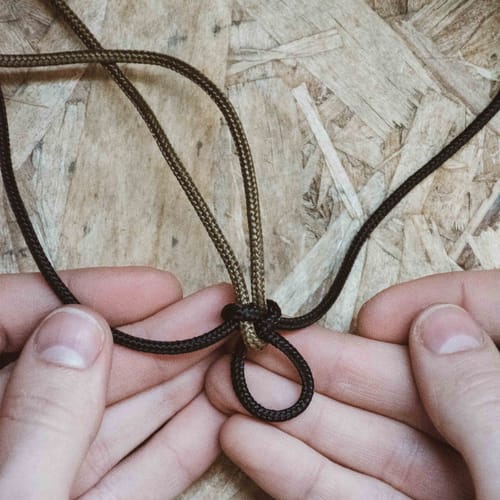
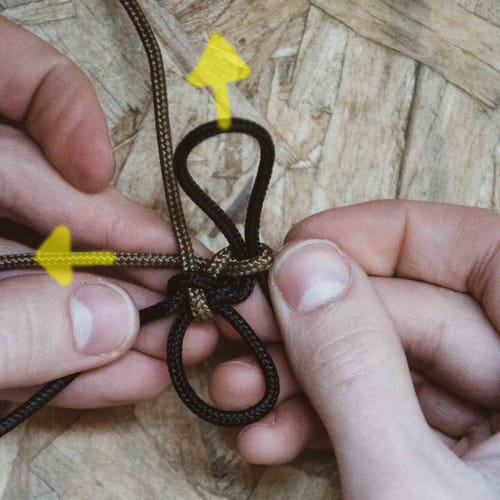
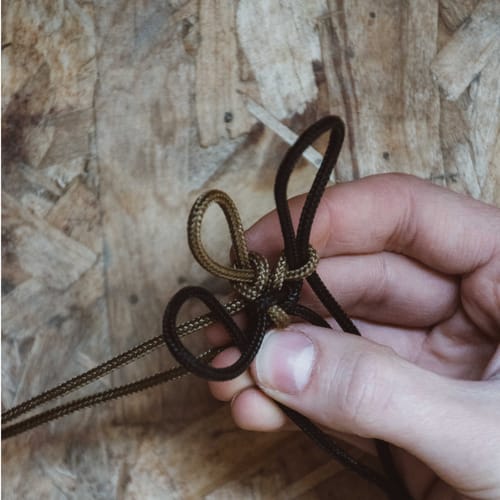
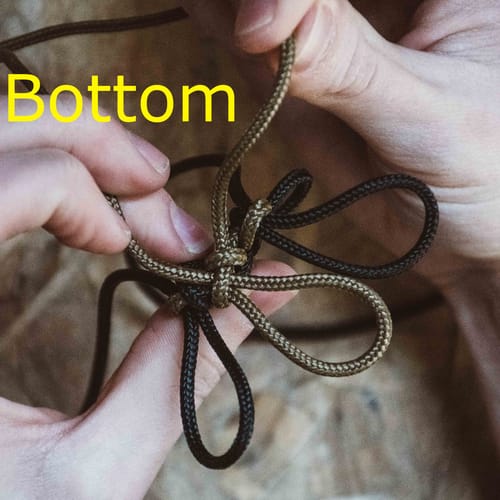
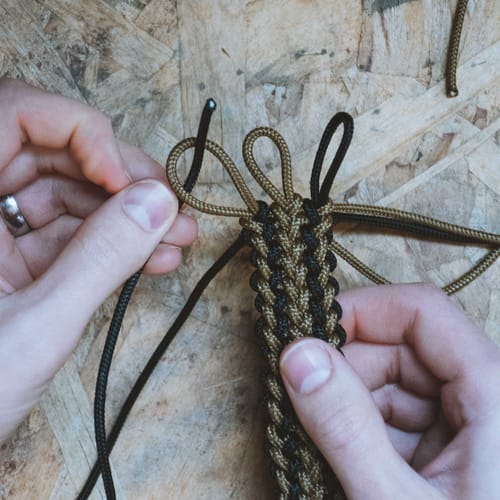
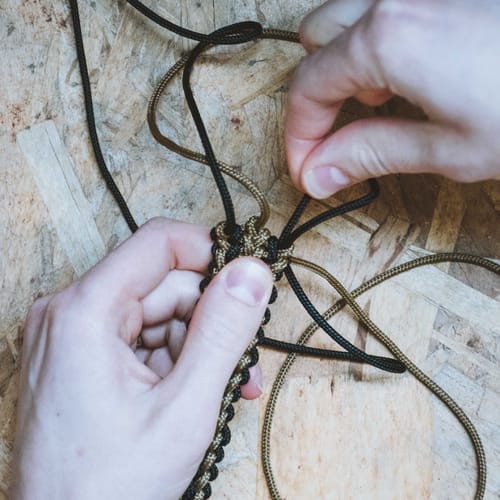
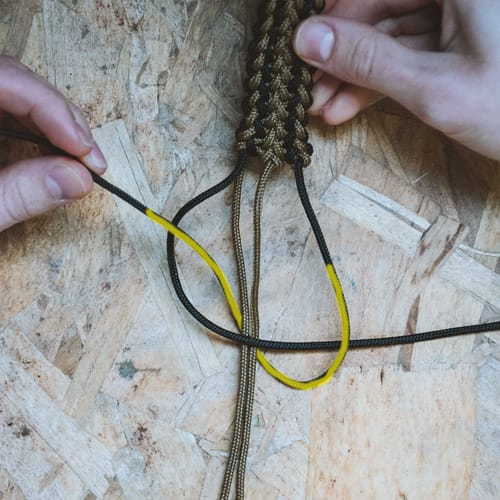
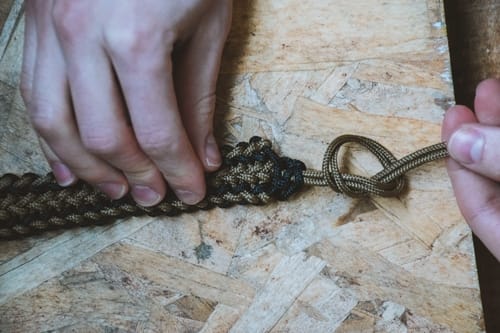
- Rotate your project so that the loose strands are pointing up. The next group of steps, making up the first row, is the hardest part of the entire weave. We have to set up the three loops that will be present until the end of the project.
- Make a loop with the right sided gold strand with the trailing/working end underneath.
- Make a bend/loop/bight with the far right black cord and pass it up, through the gold loop. I included two pictures of this step for clarity as this is an important pattern that will be repeated.
- Cinch the gold cord tight. You should also lightly pull the black loop to tighten.
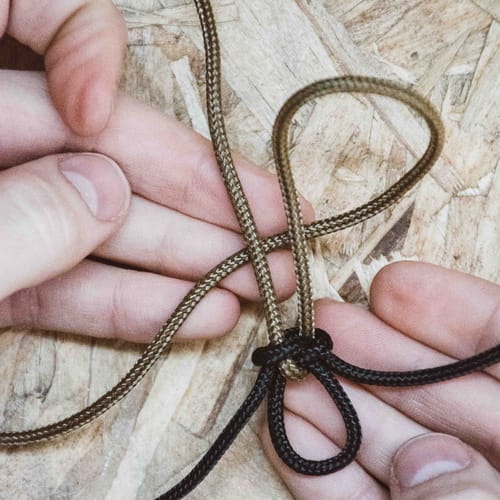
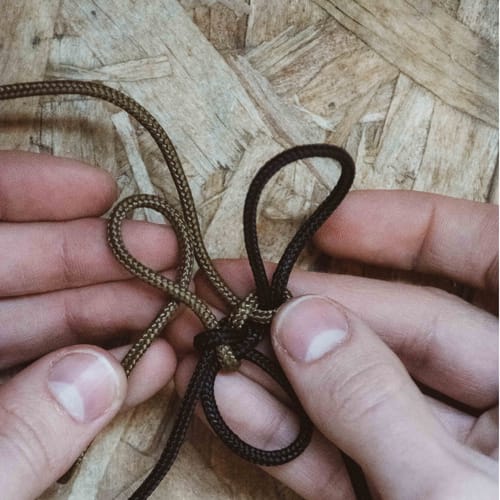
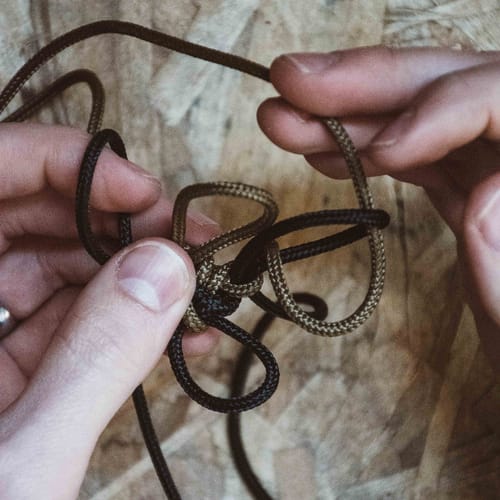
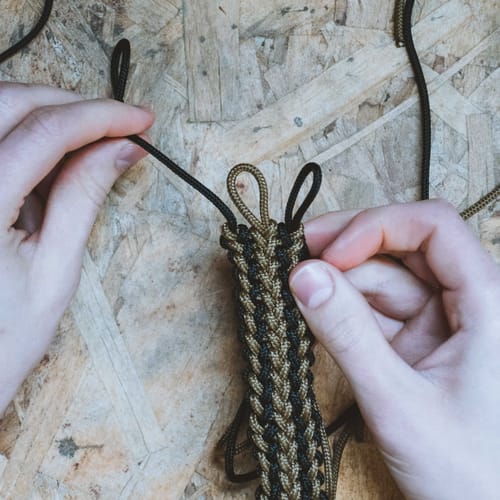
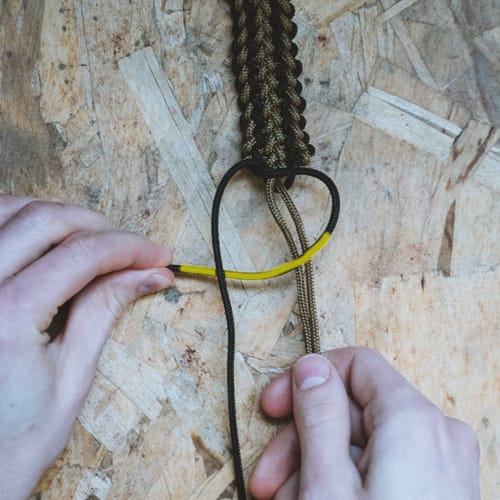
- Take your leftmost gold cord and make a loop, like before, with the working end underneath.
- Pull your right side gold cord up through the loop. NOTE: Each time, the cord that goes THROUGH the loop will be the one that went AROUND the previous loop.
- Cinch both gold cords.
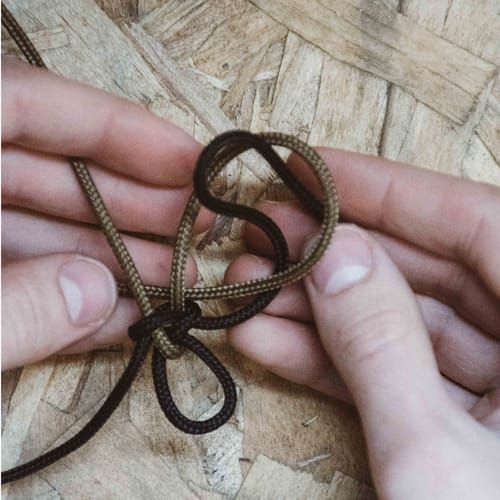
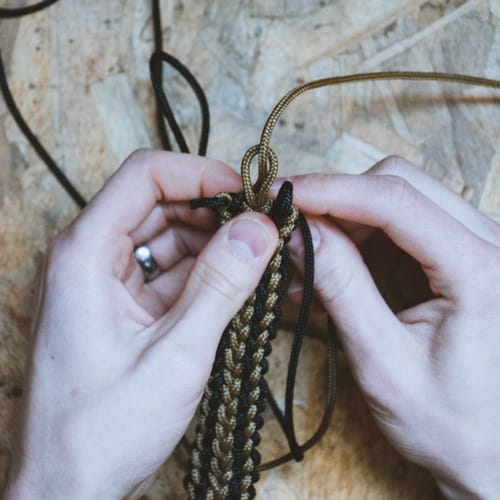
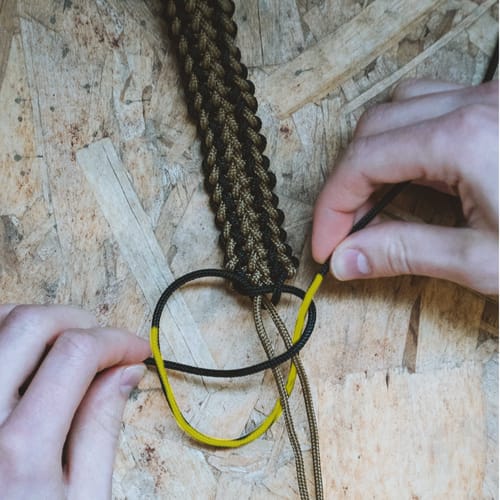
- You guessed it. Make a loop with the leftmost black cord—working end underneath.
- Pull the leftmost gold cord through the black loop.
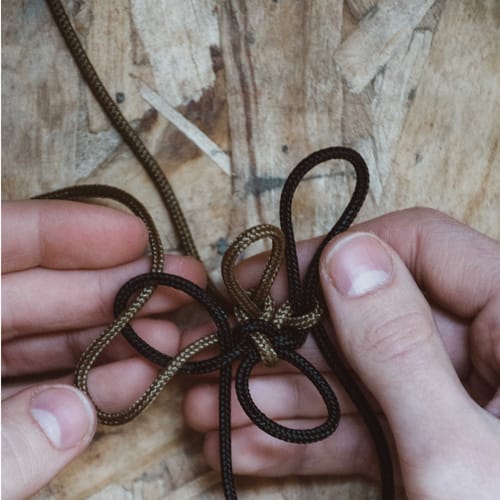
- Cinch tight. Now we are going to go back the other way, doing the same thing, but simpler, because our loops are set up.
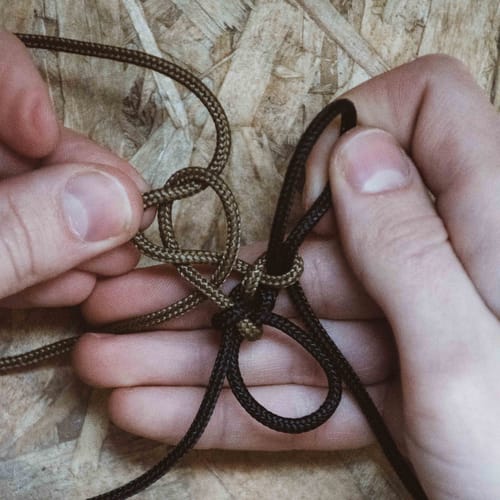
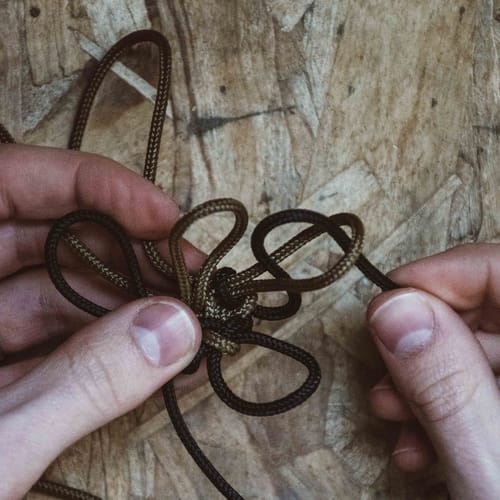
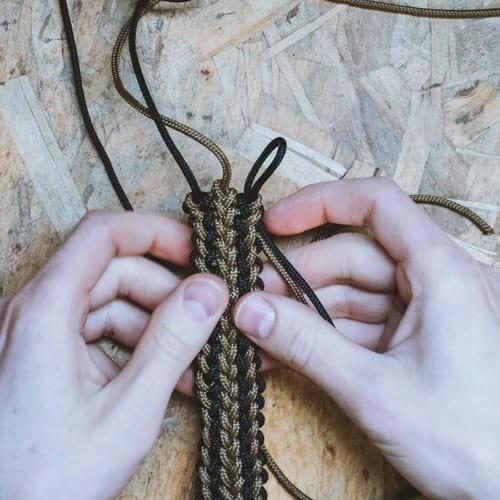
- With that information in mind, take your left side black strand and pass it through the gold loop next to it. (see previous step for another angle)
- Cinch it tight and take that gold strand and pass it through the next loop. I am showing the bottom angle for a better view. Nothing is changing from the pattern we have just established—leading ends on bottom, new loop passing through the logical direction. (If new loop is formed on the left, it goes through left to right.)
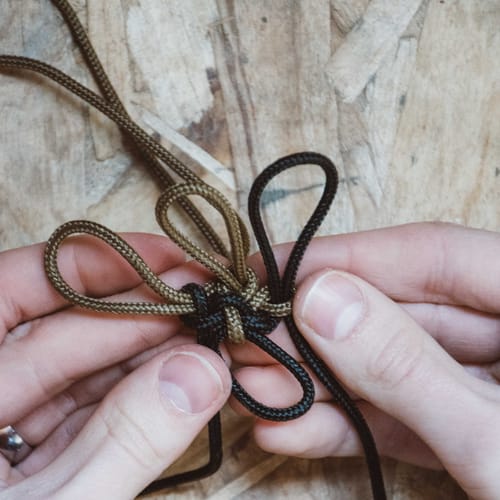
- Pull tight and pass THAT strand through the right side black loop.
- And again the other direction. All this sounding familiar yet?
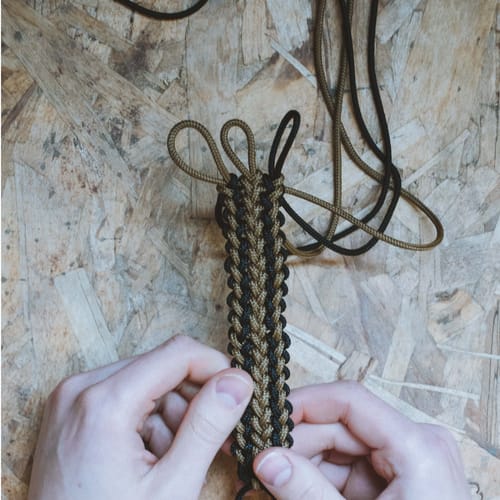
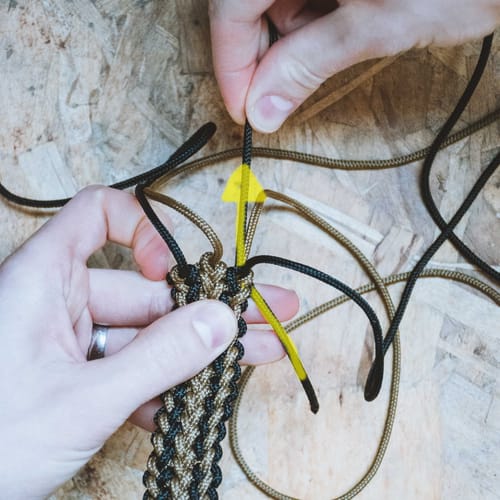
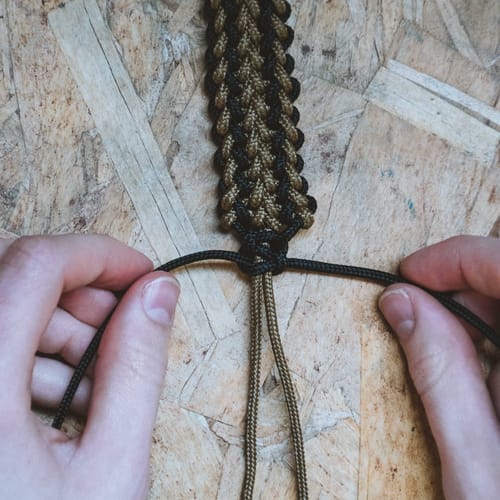
- Repeat this patern, back and forth, until you get to where the bracelet is about 2 inches short of fitting, then stop.
- Pass the ends of each cord through instead of making a new loop. Here I put the end black cord through the gold loop next to it.
- Pull that through and tighten the gold loop around it.
- Same with the gold through the other gold.
- Remember to tighten.
- One the last black cord, I actually undo the existing loop instead of sticking the end through.
- As you can see, pulling out the black loop.
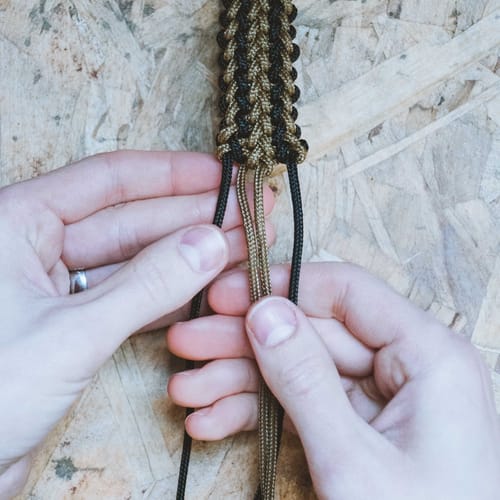
- Turn the project back around so that the loose strands are pointing towards you.
- Then you will do a cobra weave once each direction, using the brown as the center strands and the black as the outside. As you can see, left black goes over gold and under the right black.
- Right black goes undernead and up through the loop on the left.
- Then, mirror the pattern once. Right black over gold and under left black.
- Left black goes around behind and up through the loop on the right.
- Tighten those down.
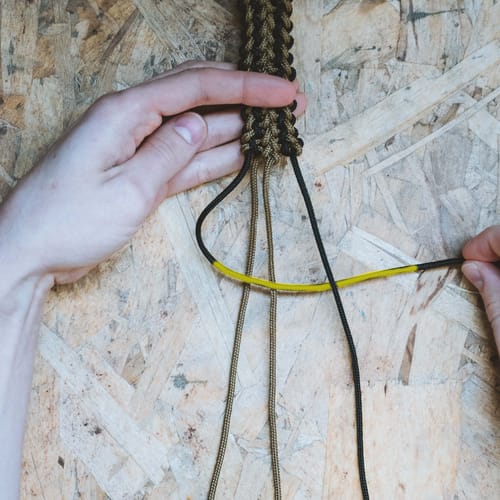
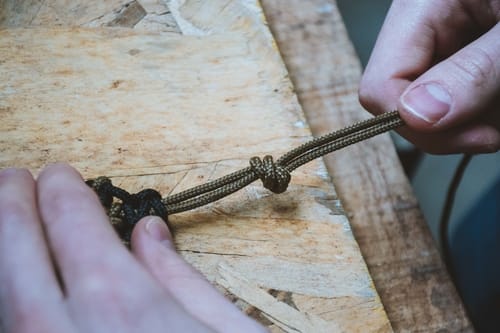
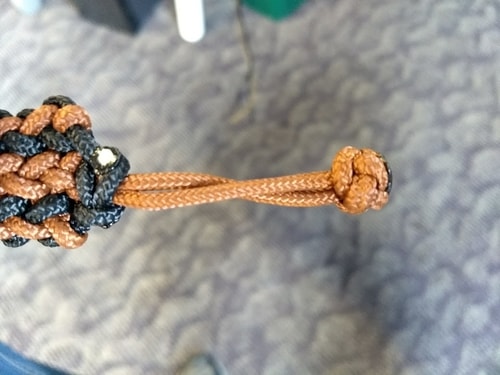
- With the gold strands, leave about an inch (or whatever you need in order to make it fit right) and tie either a diamond knot or an overhand knot. In the pictures, I show an overhand knot. For the diamond knot instructions, look below.
- Cut, melt, and flatten your ends of both the black and gold cords. All done!
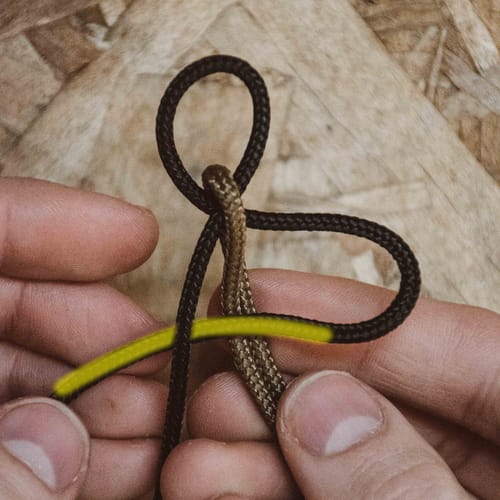


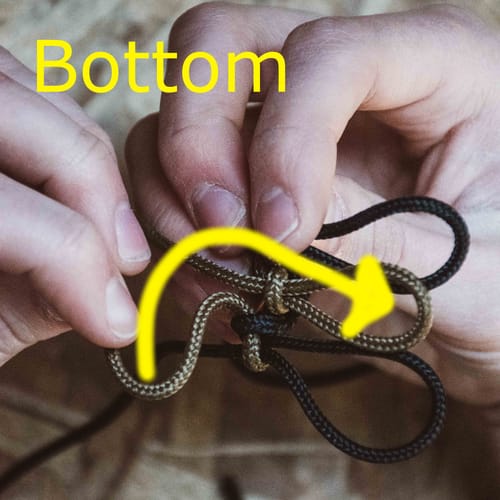
STOP! Whenever you make a loop, keep your working end on the bottom. Before you pull a new loop through an existing loop, check to make sure that your working ends are pointing downward, like in the picture.(green) This will keep your weave looking tidy and uniform. Other tutorials for this weave leave out this important detail. I had to restart a couple of times before I got this right.


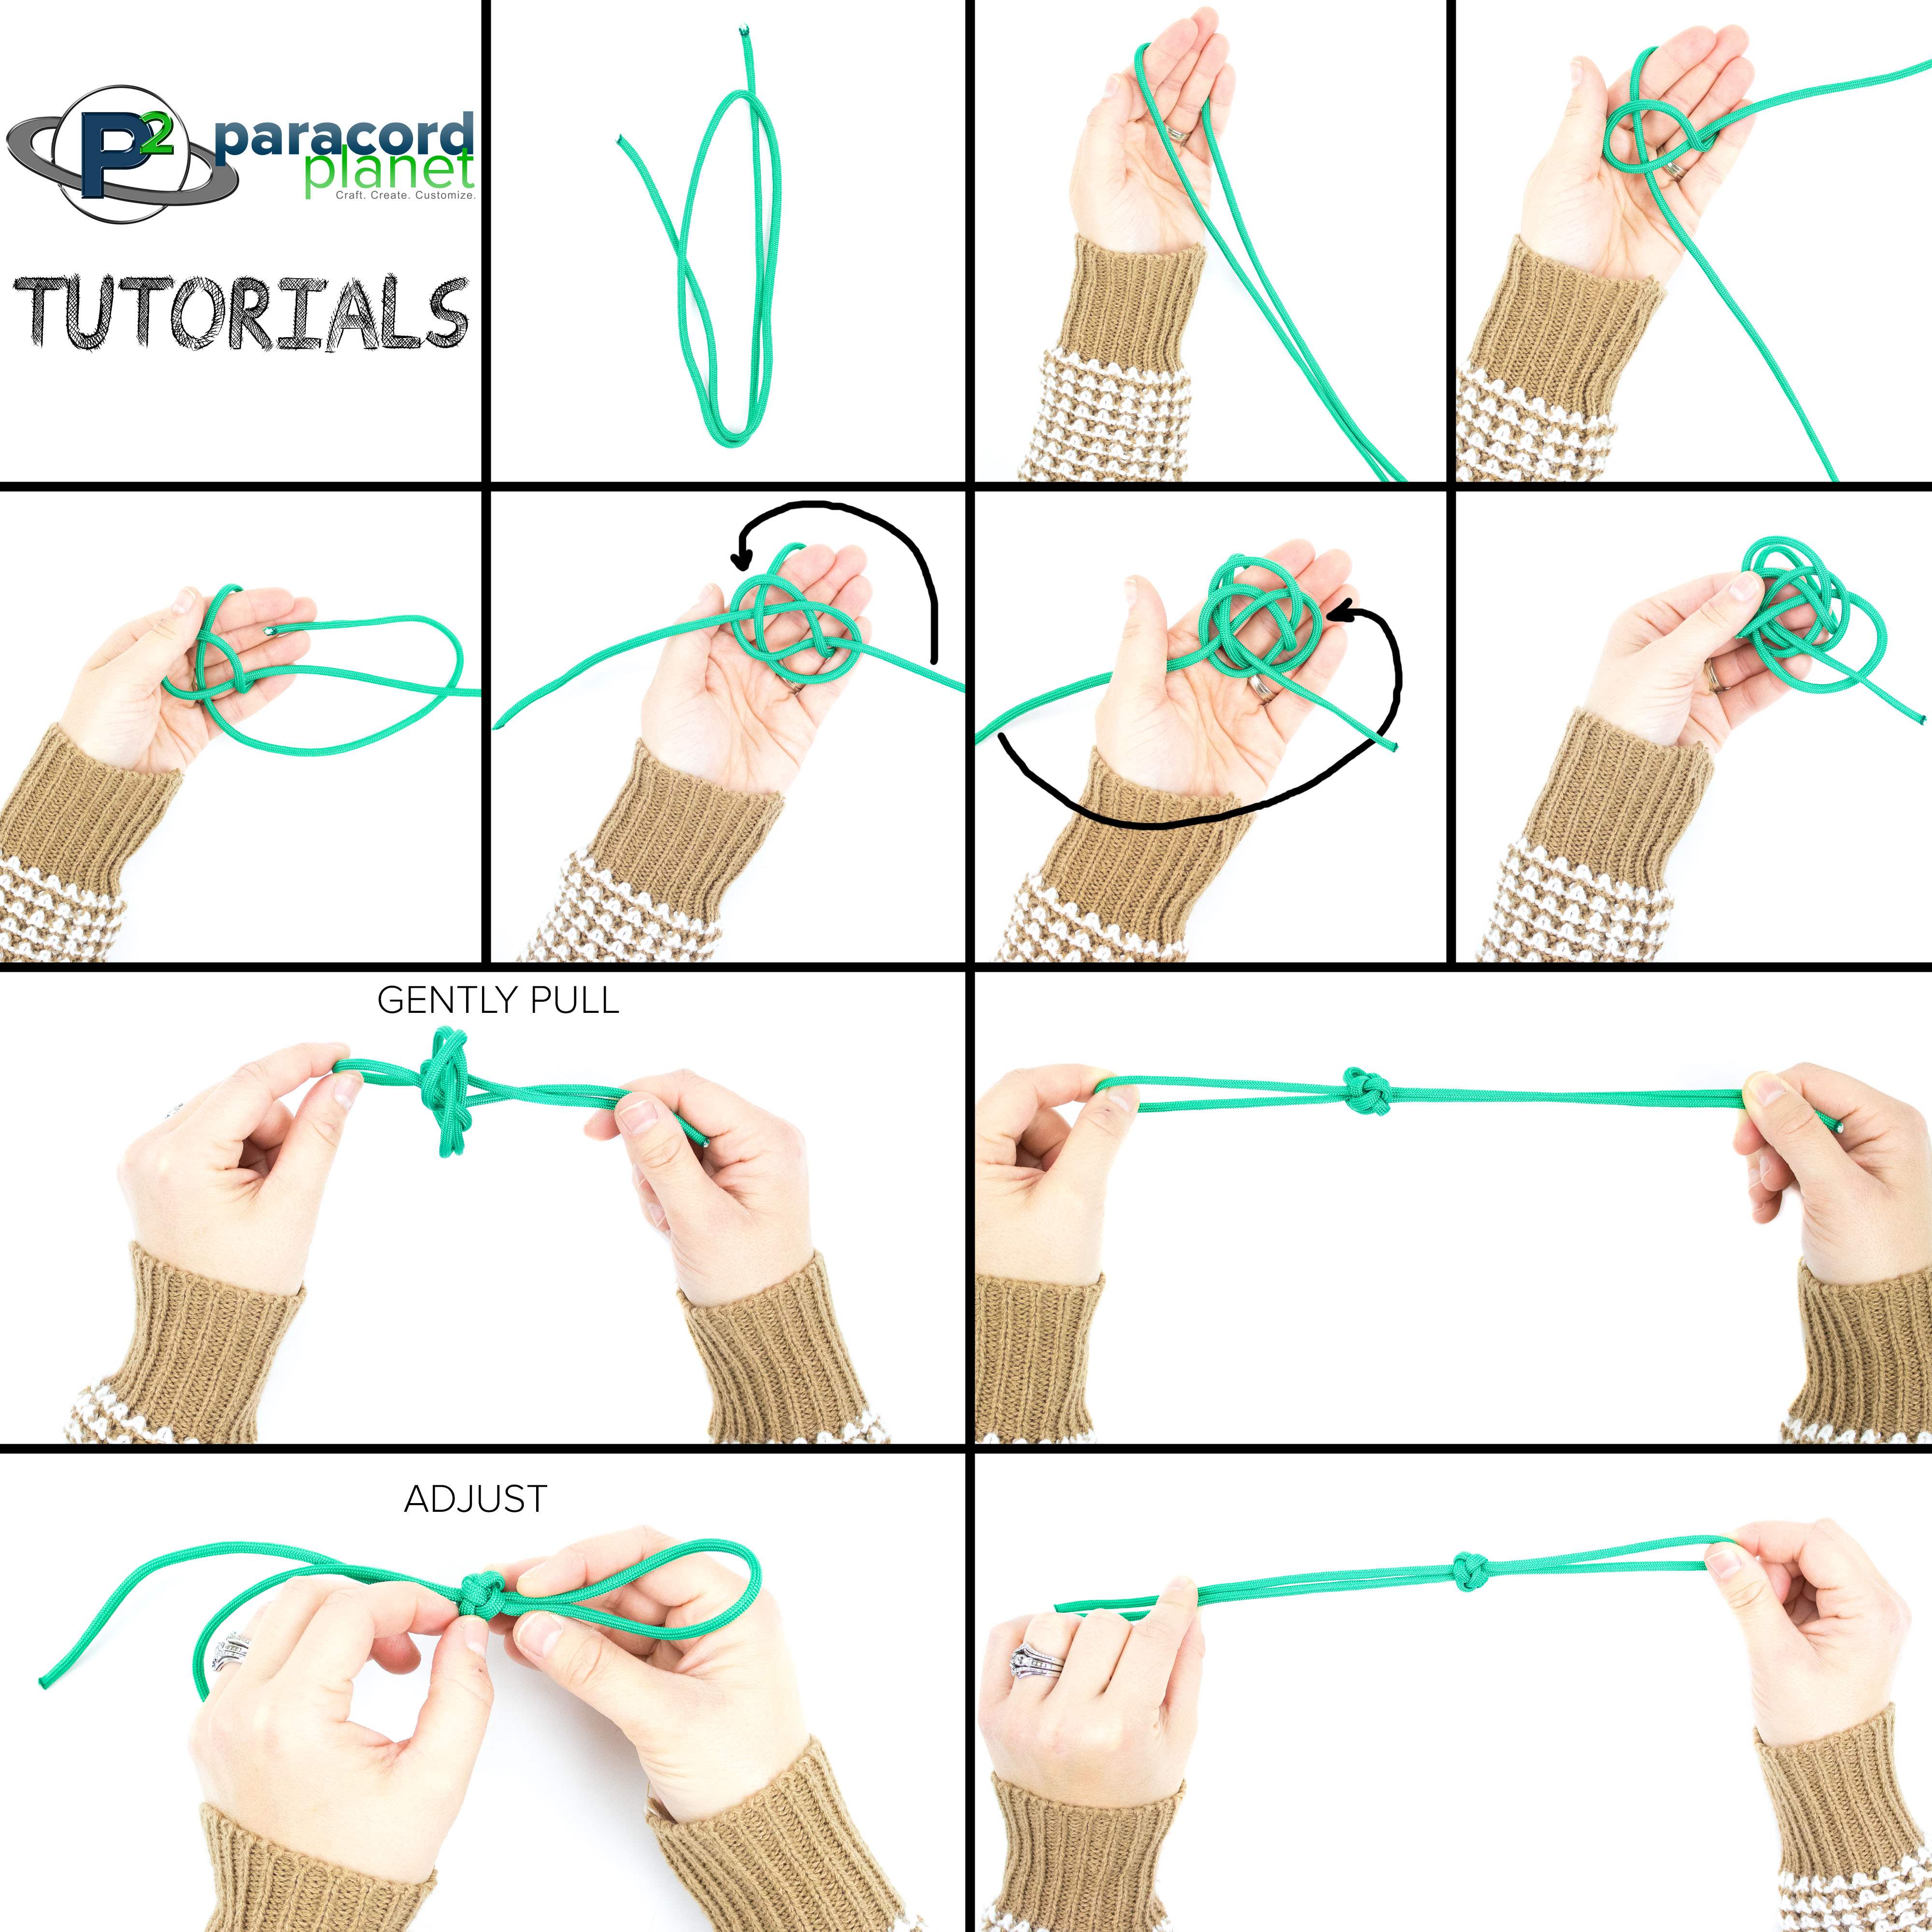
Diamond Knot
If you would rather use the diamond knot for the button closure, click the show/hide spoiler button for a tutorial.

Now you are ready to go tomb raiding!
Let us know in the comments what you thought of this tutorial. Did you like it? Was it too long? Were directions clear enough? We want to know!
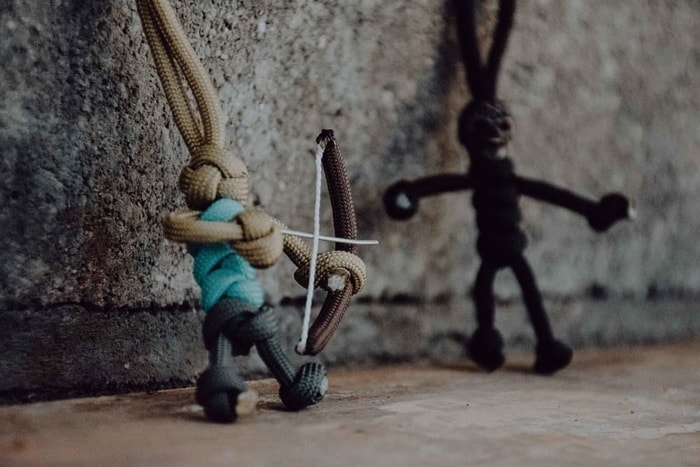
Can you guess who this is? Be sure to check back next week if you want to know how to make Paracord People!