How to Make Your First Paracord Bracelet
If you've never made a paracord bracelet before, and don't consider yourself very crafty, you might be scared to try for fear of failure. We'll, I've got some good news for you: paracord bracelets are really easy to make!
To get started, you'll obviously need some paracord. The rest of your tools and supplies are pretty minimal. Here's the list:
- 10ft of Paracord (Choose a color from this list)
- 3/8" Paracord buckle (optional)
- Scissors
- Lighter
- Ruler
Where to Start
There are a ton of different designs to choose from when making a paracord bracelet, but to keep things simple for your first one, let's make a square knot bracelet. This pattern is also known as the Cobra Weave or the Solomon Bar.
If you plan on making more than one bracelet, our bracelet kits are a good place to start. Many of them come with both paracord and buckles to get you started.
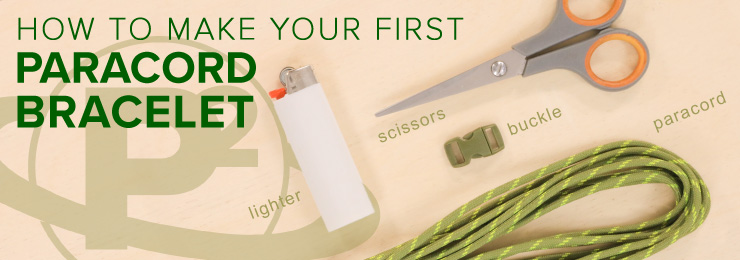
When making any paracord bracelet, it's important to measure your (or the intended wearer's) wrist size. You can do this by wrapping a piece of paracord around your wrist. Mark the spot where the end meets the rest of the cord. Measure this length of paracord against a ruler. Once you've measured your wrist, you're ready to begin crafting.
Setting Up Your Bracelet
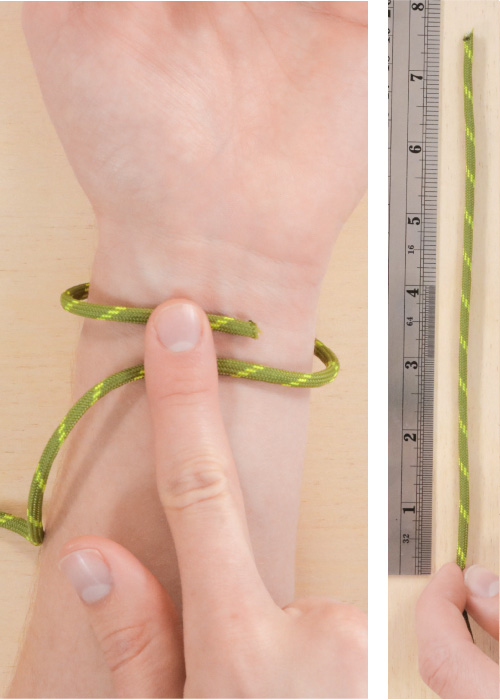
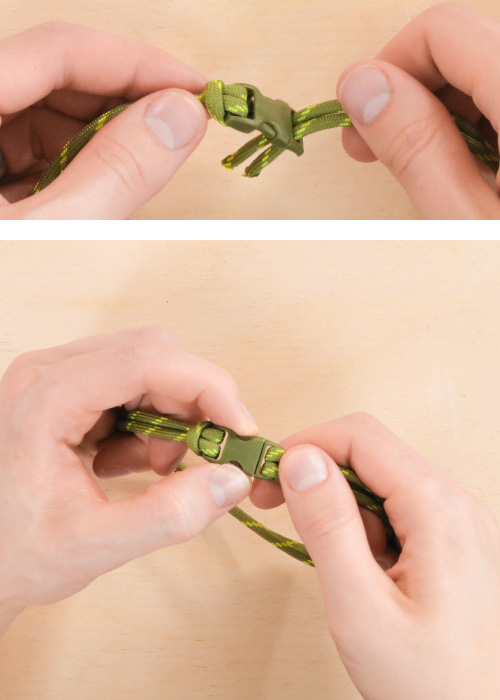
1. Begin by folding your 10ft of paracord in half. Push the folded end through the top on one side of your buckle,
2. Expand the folded end and bring the loop over the top of the buckle. Tighten down the loop as in the picture. This is called a "cow hitch" or "larks head" knot.
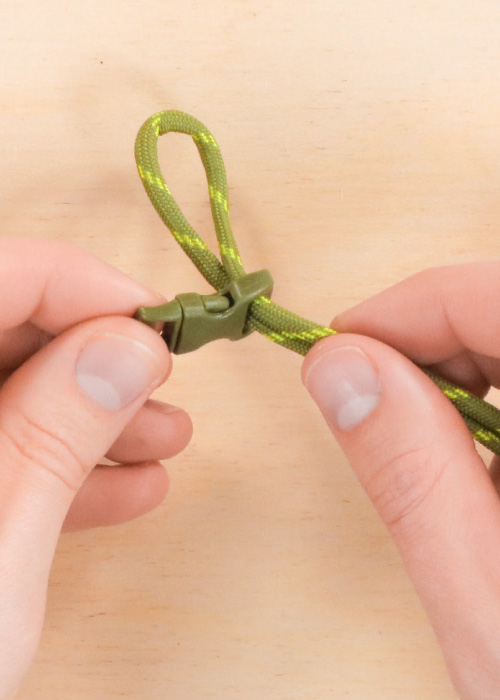
3. While being careful to not twist the two cords around each other, put the two cord ends through the top of the other side of the buckle. Pull the cord through until it is roughly bracelet size.
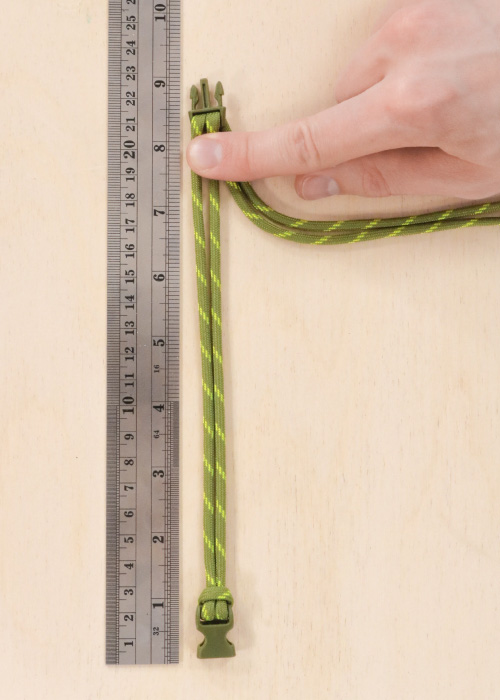
4. Detach the two buckle halves and measure the distance from one buckle end to the other. Do not include the buckle teeth in this measurement. Adjust your bracelet size until it measures 1" longer than the wrist measurement you took earlier.
Weaving Your Bracelet
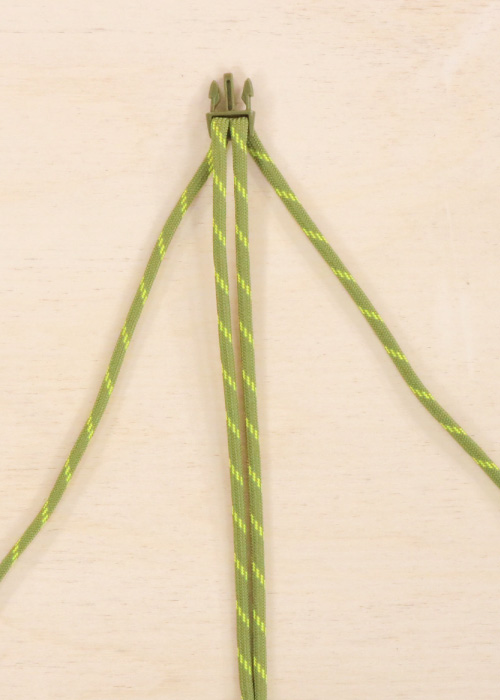
5. Lay your bracelet with one long cord on each side of the bracelet.
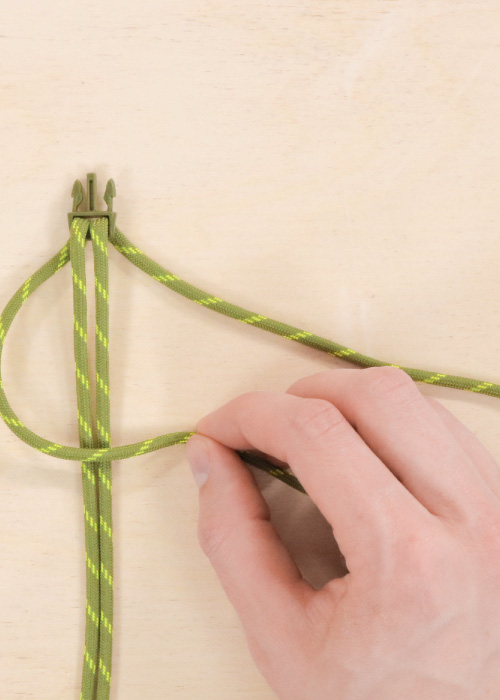
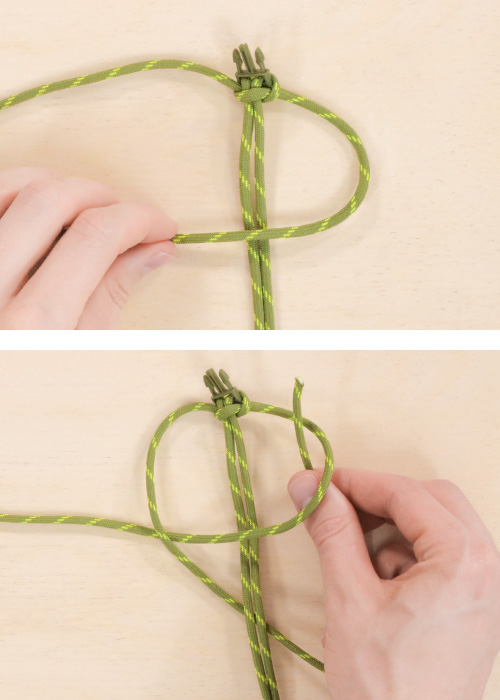
6. Cross the left cord over the middle, leaving a loop on the left side.
7. Bring your right cord straight down over the top of the crossed left cord.
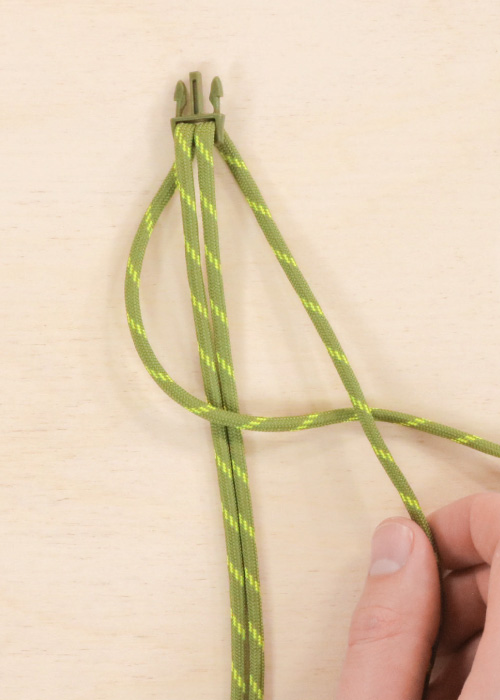
8. Then, bring the right cord behind the bracelet.
9. Finally, bring the crossed right cord up through the left loop.
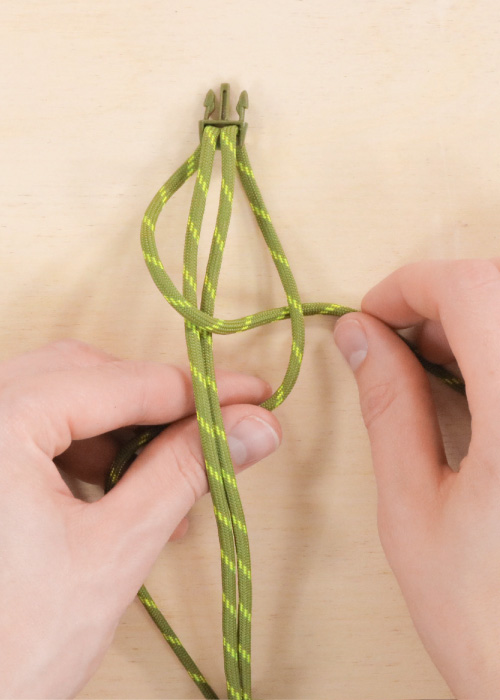
10. Holding onto where your cord goes through the top buckle half, tighten down your knot right underneath the buckle. This is a good time to make sure your bracelet hasn't gotten any longer or shorter while tying your first knot.
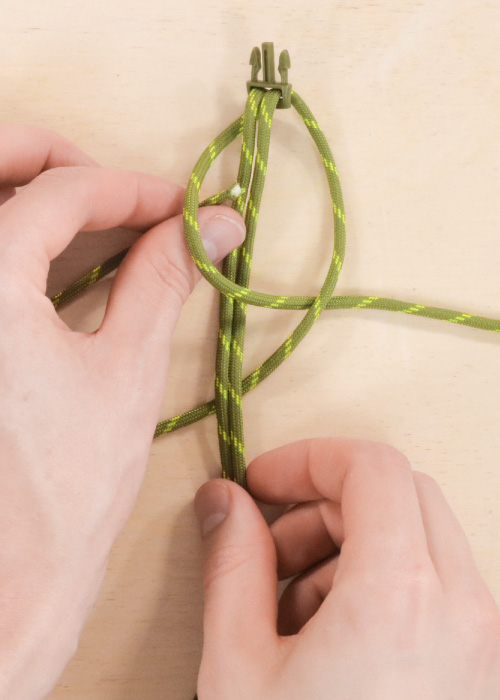
11. After checking that your bracelet is the right length, repeat the last knot, but mirrored. Place the right cord across the top. Bring the left cord over the right cord and then behind the back before coming up through the right-side loop. Tighten.
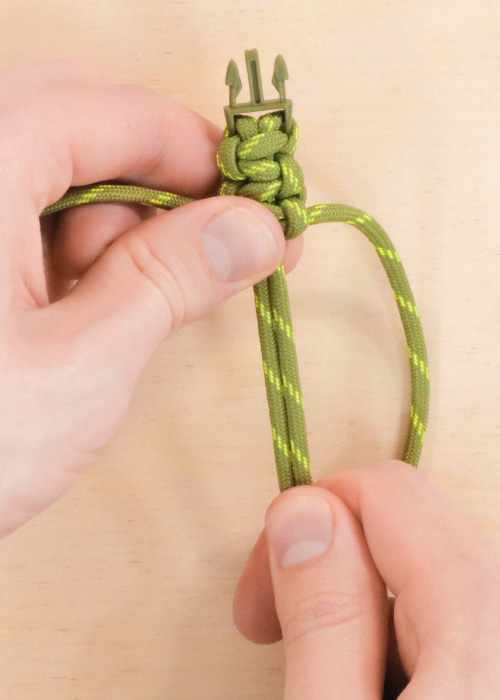
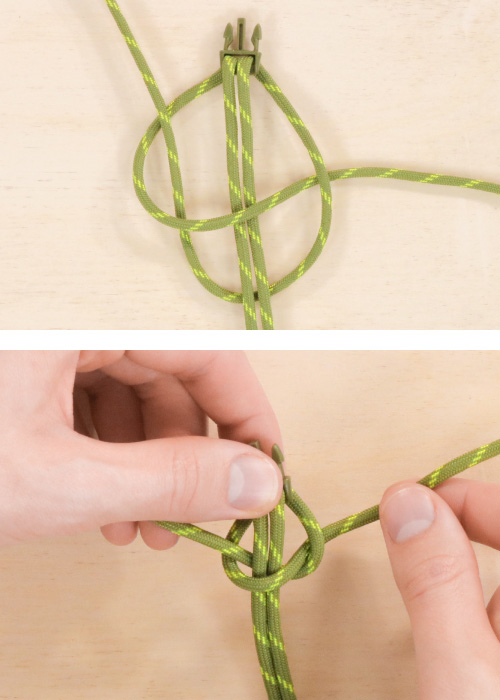
12. You have now completed one square knot. Continue alternating down the length of the bracelet. Occasionally slide your knots together to keep the weave tight and fit the most possible cord on the bracelet.
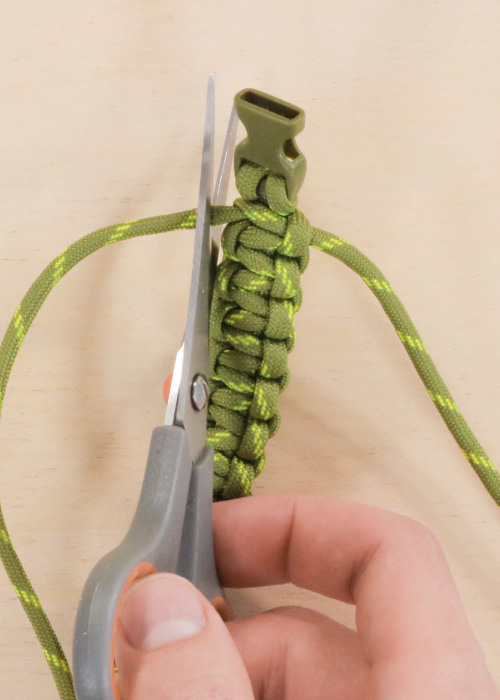
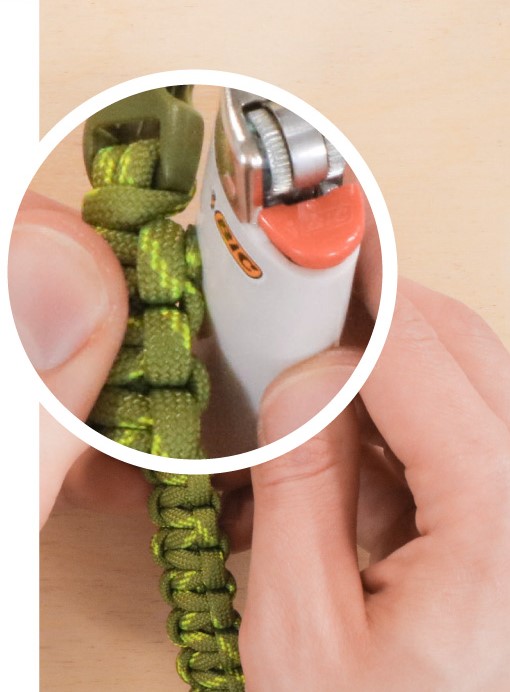
13. When you reach the end and cannot fit any more knots on the bracelet. Cut the extra cord 1/4" away from the bracelet.
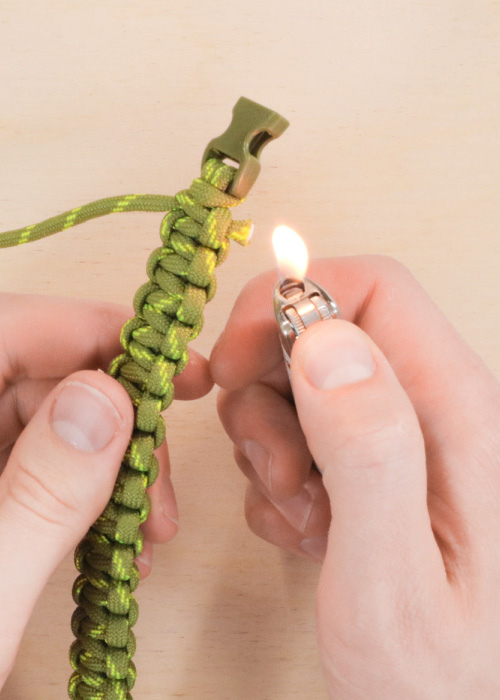
14. Use a lighter to melt the ends of the cord. Take it slow. Holding the flame too close to the cord can cause it to burn and smoke.
15. While the cord is still hot (You have about 3 seconds), press the melted portion against the bracelet using the side of your scissors or lighter. This keeps the cord from pulling through your last knot.
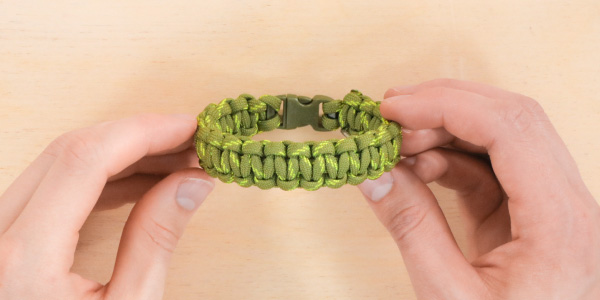
That's it. You're done!
That wasn't so hard, was it? Now that you've been initiated into the world of paracord crafting, maybe you want to try making something else. Here are a couple of other tutorials to keep you going.
This same tutorial in video format
Quick-deploy survival bracelet
Trilobite Bracelet
For more bracelets and other paracord tutorials, subscribe to our YouTube Chanel and check out our printable photo tutorials.