4 Tips and Tricks for the Paracord Crafter
Am I the only one who Googles tips when I start something new? I didn't think so. It's super helpful to get advice from other people who work in your industry. Tips and tricks make a difficult project easier or an easy project look even better.They give you the "ah ha" moment and makes everything click.
Paracord tips and tricks certainly aren't the law of the land, but they make your projects go from amateur looking to professional looking. Here are some tricks I've learned:
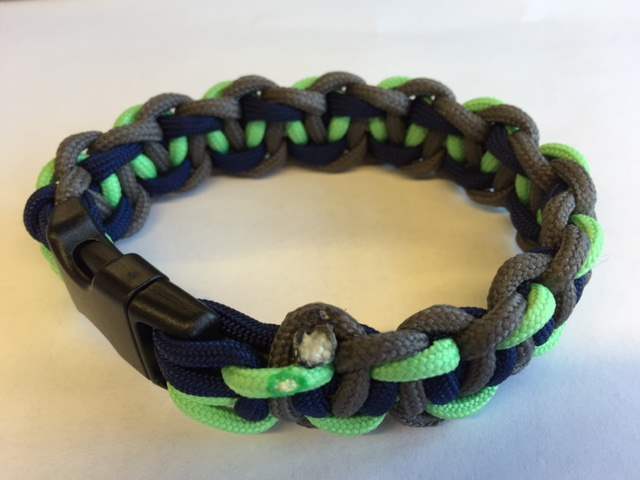
#1 Over the top method

When securing your paracord to a buckle, it makes a cleaner look if you go through the top of your buckle (as opposed to going from under) for the cow's hitch. The bracelet on the left is done with the "over the top" method and the bracelet on the right is going through the bottom of the buckle. Certainly either way works exactly the same, but the left one is just a nicer look, hides the base of the bracelet, and doesn't leave the gap as on the right.
#2 Welding vs Manny Method
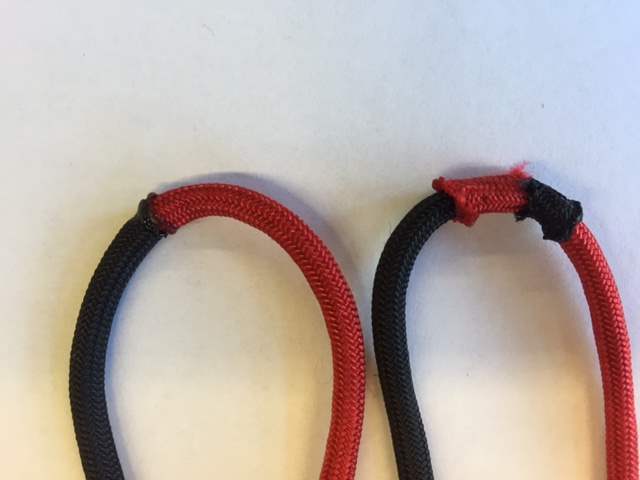
The weld is one thing that can really make your design go from clean to messy looking real quick. If you do a perfect and beautiful weave but have to a huge chuck of burned cord, it doesn't look very good. Both methods for joining paracord work great and have their advantages, however the Manny Method has 3 big pluses over traditional welding.
1. It retains its strength. With welding you lose some of the 550 toughness you've come to love. If you do the Manny Method, it remains nearly as strong as it was from the moment you bought it.
2. You can hide it much more discreetly. You can easily put this joined paracord under a weave, no one will ever see it, and you won't get a lump from a weld.
3. I've never burned myself using the Manny Method. I burn my fingers about half the time while welding so I can make sure the paracord melting sticks to each other.
However, welding does have the advantage over the Manny Method in timeliness. With welding you simply melt and hold together. But, with the Manny Method, you have to pull out about an inch of inner strands, cut, put back in, make a slit (do that all again for the other end) and then jimmy the cord through the slit.
#3 Don't burn your cord
One thing I've accidentally done MANY times is burning cord I didn't mean to when finishing my bracelet. I've been finishing off my bracelet by burning and then flattening the paracord and accidentally singed part of my weave. This effectively burns the outer color and exposes the white inner strands. That nice white spot on my beautiful mint green cord was not intentional and makes my bracelet look unprofessional. Basically, be careful and watch what you're doing when you finish your weaves. Or you can get a butane torch lighter and control your flame better.
#4 Start most weaves with a Cobra stitch
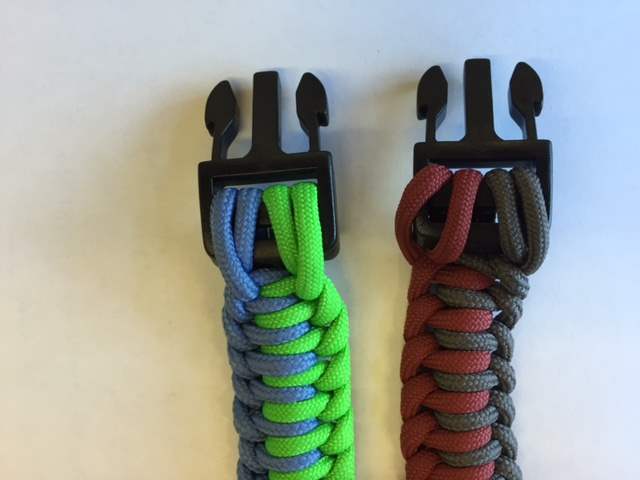
A lot of weaves (but certainly not all) have you start out with a simple Cobra/Solomon stitch for two reasons:
1. It's incredible easy and most people know it by heart.
2. Most importantly, it pulls in your cord from the buckle and holds it tightly in place.
On the photo above, the left bracelet was started with 1 Cobra stitch. It looks very clean and doesn't disrupt the bracelet at all. The bracelet on the right wasn't started with the Cobra. Notice how the weave doesn't pull in the cords tight to the buckle and they slide to the side. The bracelet on the left has a much cleaner look and you won't have to be pushing cord all day long.
What tips would you add to this list?
Let us know in the comment section or on Facebook, Twitter, Pinterest, and Instagram.
Paracord Love, Lauri